Follow Me On Social Media!
Mini Pavlova Recipe: Light, Fluffy, and Irresistibly Sweet!
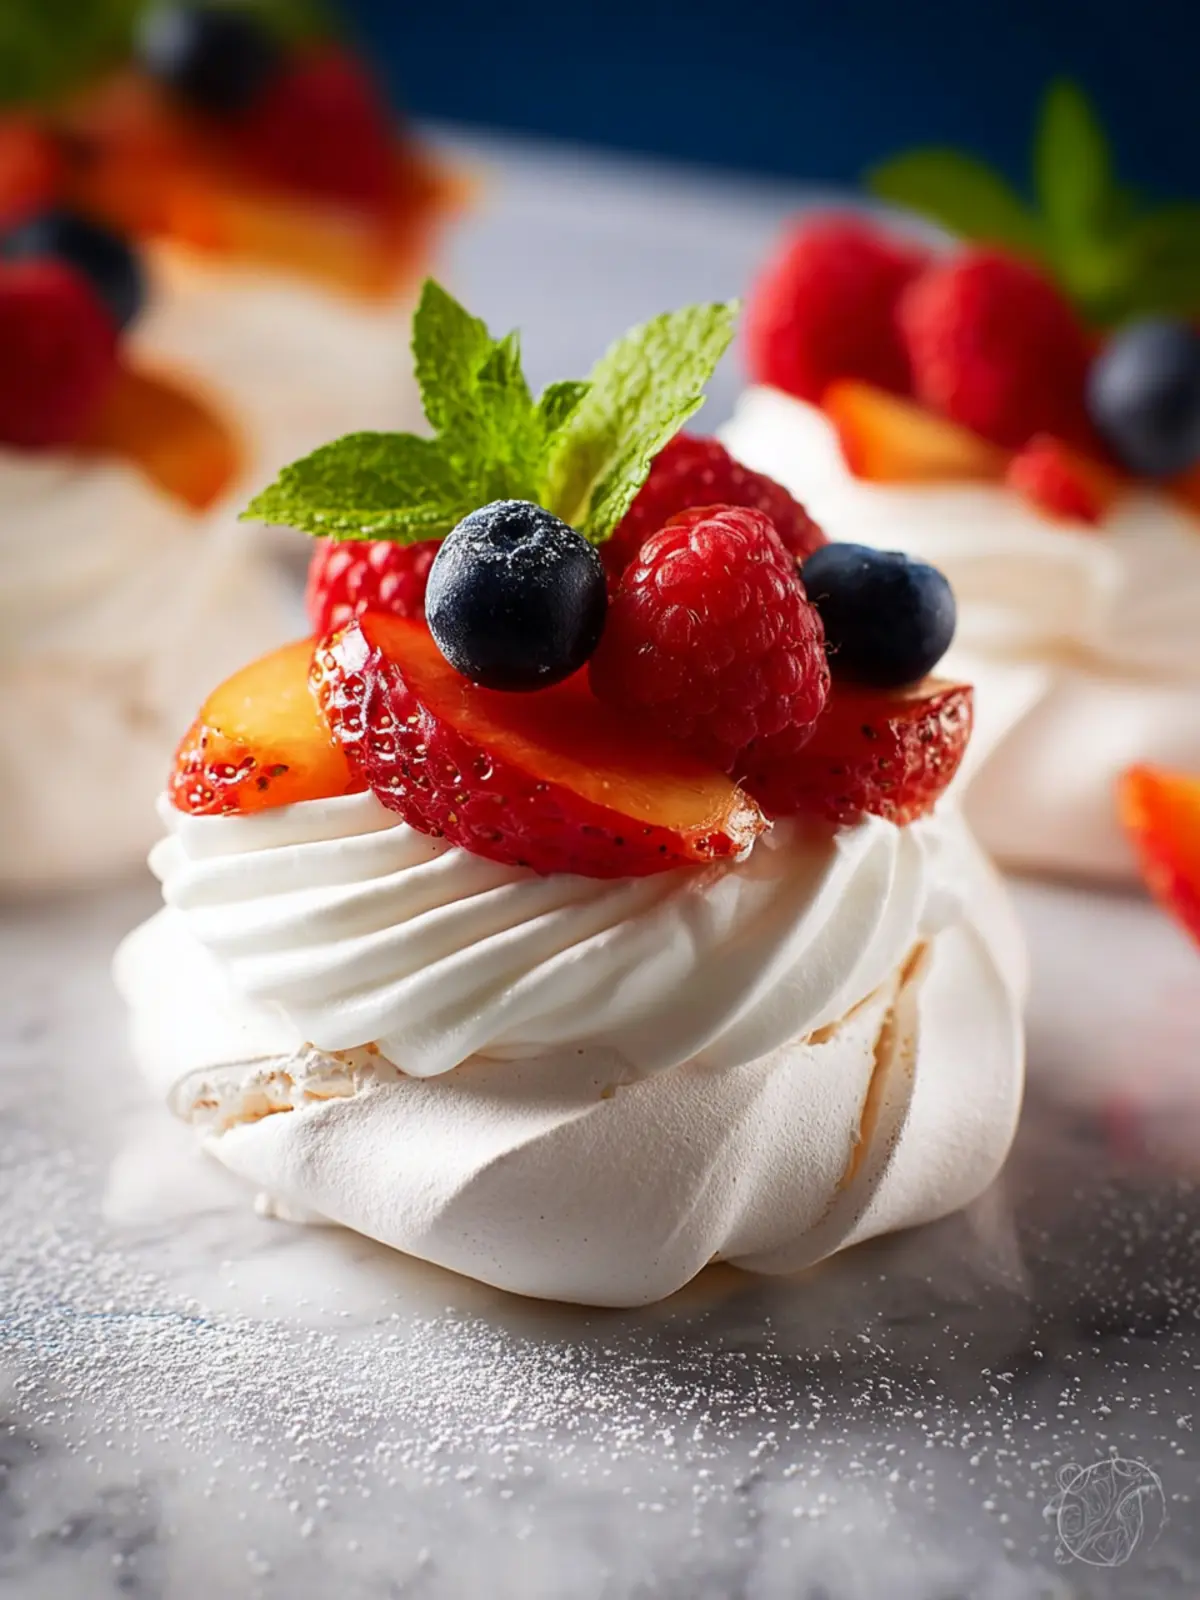
Introduction to Mini Pavlova Recipe
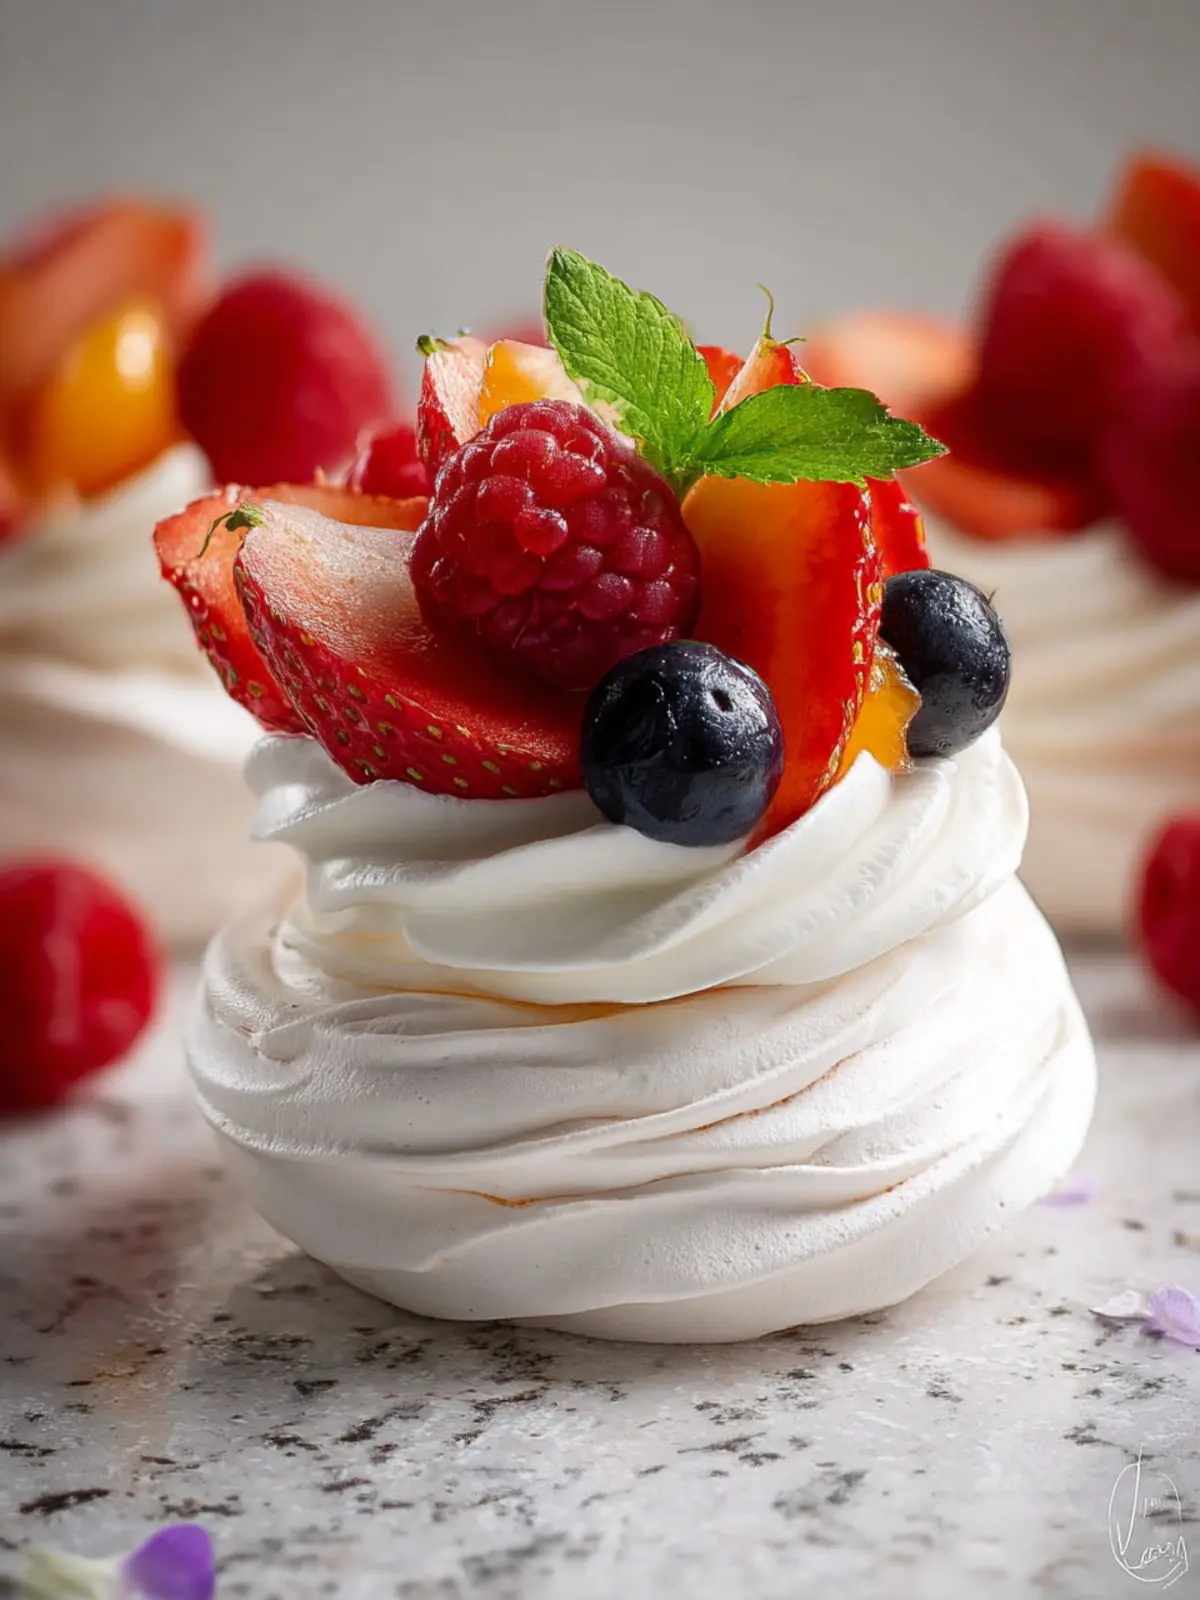
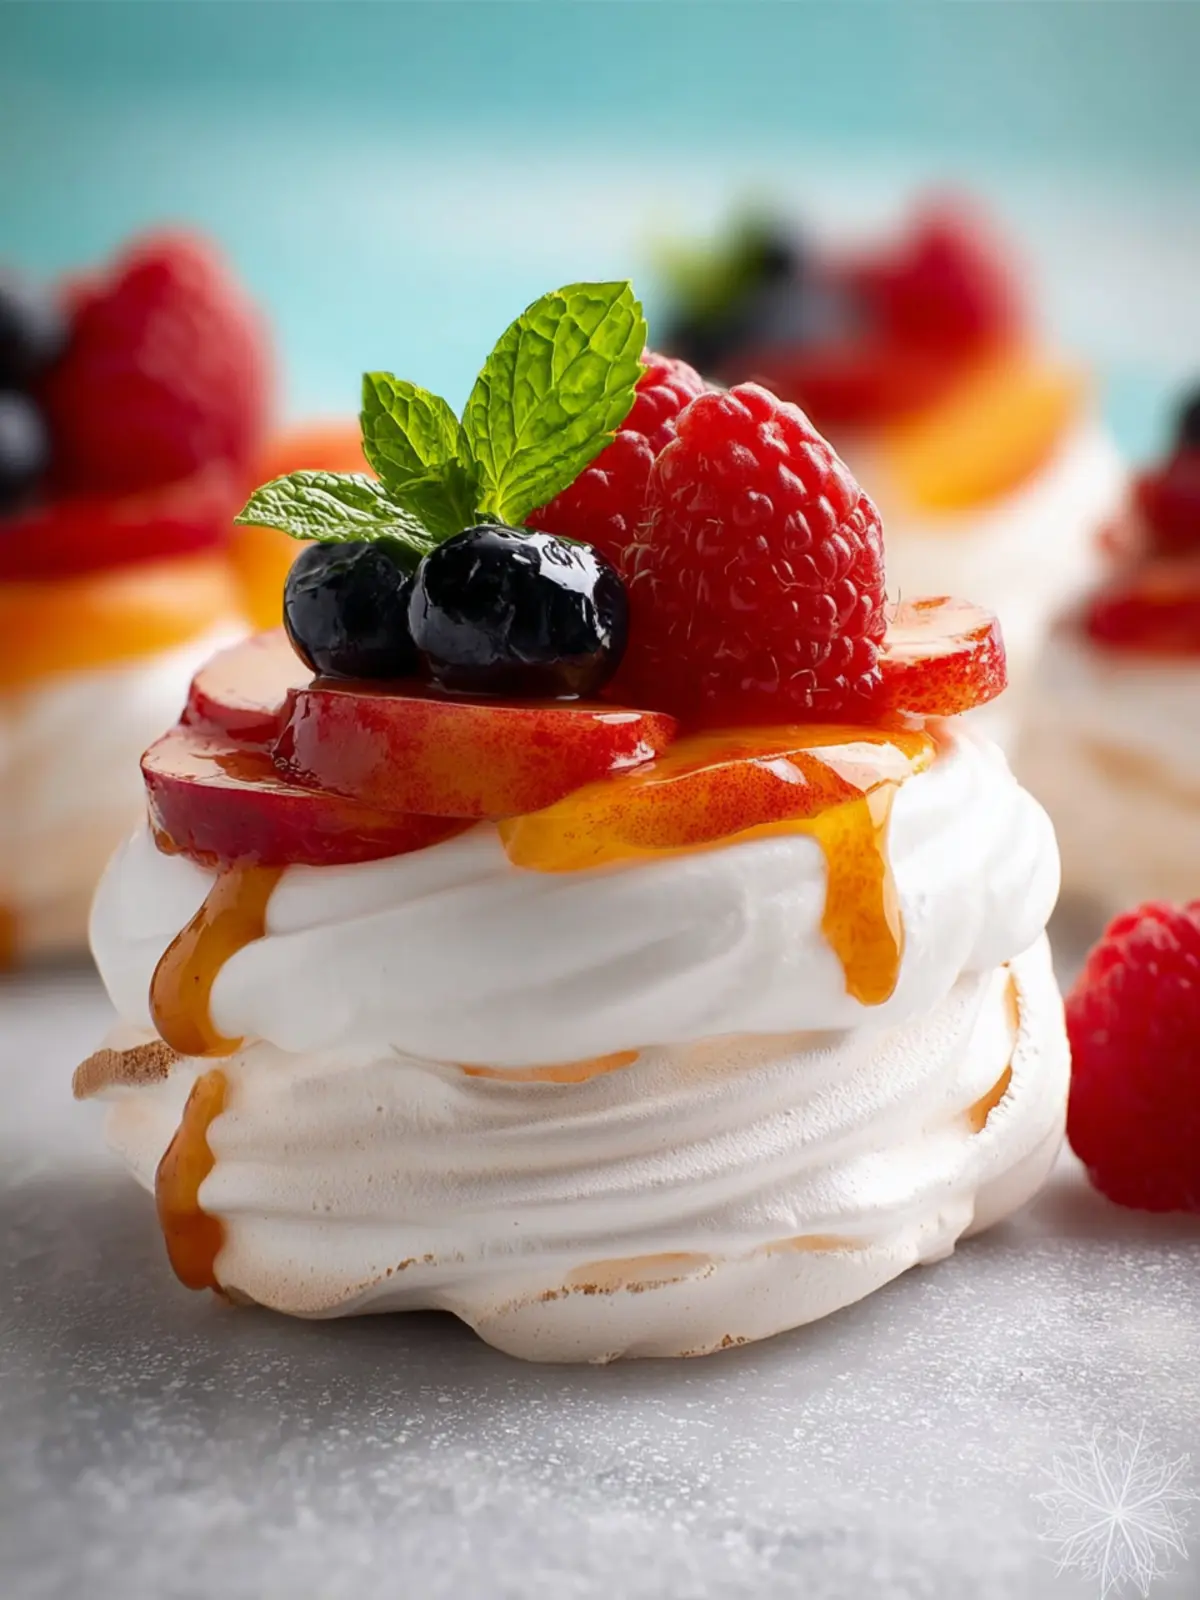
Creating a delightful mini pavlova recipe is an enchanting experience that combines whimsy and indulgence in one bouncy bite. Imagine crispy meringue shells cradling a fluffy cloud of whipped cream, topped with vibrant fresh fruit—a sweet treat that never fails to impress at gatherings. Whether you’re celebrating a special occasion or simply looking to elevate your dessert game on a weeknight, these little meringue masterpieces will have you and your guests swooning.
The magic of making mini pavlovas lies not just in their elegant appearance but also in the surprisingly simple process of making meringue that is both airy and crisp. The origins of pavlova date back to the 1920s, inspired by the famous Russian ballerina Anna Pavlova. Just like her performances, each bite of pavlova is both light and ethereal, helping you indulge your sweet tooth without feeling heavy. Plus, crafting these mini versions allows you to personalize each pavlova—a canvas for your favorite seasonal fruits and toppings.
As you prepare to embark on your mini pavlova journey, you might wonder which fruits to choose for that perfect topping. Fresh berries, mango slices, or kiwi all shine brightly against the pristine white clouds of meringue, providing color and delicious contrasting flavors that brighten each bite. Not only do they taste incredible, but they also provide a pop of nutrition, making these tiny desserts feel just a little less guilty.
This mini pavlova recipe is a blend of simple ingredients that together create a stunning finale to any meal. You’ll find that with just a few pantry staples, you can whip up these delightful confections. All it takes is a bit of patience while the meringue dries in the oven and a touch of creativity when decorating.
So roll up your sleeves, gather your ingredients, and prepare for a little baking adventure. Once you master this delightful dessert, trust me, you’ll want to make mini pavlovas over and over again. They’re the perfect compliment to any celebration or even a quiet evening in with friends.
Key Ingredients for Mini Pavlova Recipe
Creating the perfect mini pavlova is all about selecting the right ingredients. Let’s explore each element that contributes to this delightful dessert.
Egg Whites
The star of the show in any pavlova is egg whites. For that perfect airy texture, I recommend using fresh, room-temperature egg whites. They whip up beautifully, creating those lovely stiff peaks that are essential for a successful mini pavlova recipe.
Sugar
Granulated sugar is key in stabilizing the meringue and giving it that delightful sweetness. I prefer fine sugar, as it dissolves more easily during whipping, ensuring a smooth and glossy finish.
Cornstarch
Adding cornstarch to your mix helps achieve that crisp outer shell while maintaining a soft marshmallow-like center. It’s a game changer for creating that perfect contrast in texture.
Vinegar or Lemon Juice
A splash of vinegar or lemon juice acts as an acid that stabilizes the egg whites, allowing them to hold their shape even after baking. It’s a small addition with a huge impact on the final outcome.
Toppings
Don’t forget the toppings! Fresh fruits like berries, kiwi, or passion fruit add color and a burst of flavor, while whipped cream offers a creamy contrast that brings everything together beautifully.
These key ingredients will set you on the path to mini pavlova perfection, providing a delightful treat that’s light yet satisfying. Dive into this sweet adventure and enjoy the process!
Why You’ll Love This Mini Pavlova Recipe
When it comes to dessert, few things can compete with the charm of a mini pavlova recipe. These delicate treats are not just visually stunning but also delightful in taste and texture, making them an instant crowd-pleaser. Imagine sitting down with friends or family, each of you holding a petite cloud of meringue, topped with luscious cream and your favorite fruits—pure bliss!
Light and Elegant Dessert
The beauty of this mini pavlova recipe lies in its airy meringue base, which is both light and crispy on the outside while remaining soft and chewy inside. It’s the ideal dessert for those warm summer nights or special occasions when you want something sweet but not heavy.
- Versatile Toppings: You get to choose! Fresh berries, citrus slices, or a drizzle of chocolate sauce can make each pavlova uniquely yours.
- Easy to Prepare: Even if you’re a kitchen novice, the straightforward steps of this recipe make it a breeze. Whipping egg whites to perfection is all it takes to create your masterpiece.
- Impressive Presentation: Each mini pavlova is a stunning work of art, sure to impress your guests. Who doesn’t love ending a meal with dessert that looks as great as it tastes?
With this mini pavlova recipe, you’re set to create a delectable dessert that’s sure to be a hit every time!
Tips for Making Perfect Mini Pavlova
Crafting the ideal mini pavlova recipe is all about precision and a touch of culinary magic. These delightful meringue nests can be a showstopper at any gathering, so let’s explore some cherished tips to elevate your dessert!
Achieving the Ideal Texture and Presentation
-
Egg Whites: Start with room temperature egg whites; they whip up into beautiful, stable peaks. Make sure your mixing bowl is completely clean and dry, as even a tiny speck of grease can hinder the process.
-
Sugar Gradually: Incorporate granulated sugar gradually while whisking. This step is crucial—too much sugar at once can deflate those precious egg whites. Aim for a glossy, thick meringue that holds stiff peaks, which will hold their shape when baked.
-
Vinegar and Cornstarch: Adding a splash of white vinegar and a teaspoon of cornstarch to the meringue will help create that sought-after soft interior while maintaining a crisp exterior. Think of it as the secret to achieving a perfect pavlova!
-
Baking Time: Bake low and slow! A gentler approach at a lower temperature allows the meringue to dry out beautifully without browning. After baking, turn off the oven and leave the door ajar to let the pavlovas cool gradually, which helps prevent cracks.
These thoughtful techniques will ensure your mini pavlova recipe not only looks stunning but also tastes heavenly!
Time Details for Mini Pavlova Recipe
Creating the perfect Mini Pavlova is not just about the delightful outcome; it’s also about savoring the journey through the kitchen. Understanding the time commitment involved can help you plan your dessert-making adventure seamlessly.
Preparation Time
To get started on your Mini Pavlova recipe, set aside about 20 minutes for preparation. This time includes whisking egg whites to that perfect glossy peak and gently folding in sugar.
Baking Time
The baking time is crucial for achieving that signature crunchy outer shell yet soft middle. Expect to bake your pavlovas for roughly 1 hour.
Total Time
In total, the heartfelt process of whipping up these delightful desserts will take you around 1 hour and 20 minutes. Enjoy each step while imagining the sweet taste that awaits!
Nutritional Information for Mini Pavlova Recipe
Creating the perfect mini pavlova recipe not only pleases your palate but can also keep your nutrition on track! Let’s break down the key nutritional components of this delightful dessert.
Calories
A serving of mini pavlova typically contains about 120 calories. This makes it a light yet satisfying treat, ideal for an afternoon pick-me-up or a delightful end to your meal.
Protein
While these cloud-like confections aren’t a protein powerhouse, each mini pavlova does pack around 2 grams of protein. The egg whites contribute to this, giving you a little boost without the heaviness.
Sodium
One of the best parts about making your own mini pavlova recipe is control over sodium. On average, each serving contains roughly 30 milligrams of sodium. This means you can indulge guilt-free while enjoying the sweet and airy texture of the pavlova.
Being mindful of nutritional value is just as delicious as the dessert itself!
FAQs about Mini Pavlova Recipe
When the light, airy clouds of meringue come together with fresh fruit and whipped cream, you find yourself in a dessert paradise with the mini pavlova recipe. It’s a delightful treat that sparks joy in every bite, making it essential to know how to care for leftovers and optimize your experience!
How do I store leftover pavlova?
If you find yourself with leftover mini pavlovas, storing them correctly is key. Ideally, keep the meringue shells in an airtight container at room temperature. This helps maintain their crispy exterior. Once you’ve added toppings like cream and fruit, it’s best to consume them the same day, as the moisture can make the meringue soft.
Can I make the meringues ahead of time?
Absolutely, making the meringue shells ahead of time is a great idea! You can bake them a day or two in advance. Just remember to allow them to cool completely before storing them. Keep them in an airtight container to preserve their crunchy texture, making it easy to assemble your mini pavlova recipe whenever you’re ready.
What fruits pair best with pavlova?
Pavlova is incredibly versatile! Commonly, you’ll find it topped with:
- Kiwi: The tartness beautifully contrasts the sweet meringue.
- Berries: Strawberries, blueberries, and raspberries add vibrant color and freshness.
- Passion fruit: Its tangy flavor brings an exciting twist.
- Bananas: Slices of banana can create a delightful creaminess.
Feel free to mix and match based on seasonal availability or personal preference. Keeping the layers fresh and colorful elevates the presentation and your dining experience!
Conclusion on Mini Pavlova Recipe
In wrapping up our delightful mini pavlova recipe, it’s clear that these charming desserts are a celebration of simplicity and elegance. With their crisp outer shell and soft, marshmallow-like interior, they’re perfect for any occasion, whether it’s a casual gathering or a special event. The beauty of pavlovas lies in their versatility; you can top them with your favorite seasonal fruits and a drizzle of cream to elevate their sweet allure. Why not take a moment to prepare this enchanting treat? Trust me; each bite will remind you why desserts like this bring joy to our lives.
Print
Pavlova with Fresh Fruit
- Total Time: 4 hours
- Yield: 8 servings 1x
- Diet: Gluten-free
Description
A delightful pavlova topped with fresh fruit and whipped cream, perfect for any occasion.
Ingredients
Scale
- 6 large egg whites (room temperature)
- 1½ cups granulated sugar
- ½ tbsp lemon juice
- ½ tbsp vanilla extract
- 2 tsp cornstarch
- 1½ cups (very cold) heavy whipping cream
- 2 tbsp powdered sugar
- 4–5 cups fresh fruit (blueberries, raspberries, sliced strawberries, sliced peaches, kiwi, etc.)
- 15 small mint leaves (for garnish, optional)
Instructions
- Preheat your oven to 200°F. Line a large baking sheet with parchment paper.
- Using a stand mixer or handheld electric mixer, beat the egg whites on high speed for about 1 minute until soft peaks form. With the mixer still on, gradually add in the sugar, 1 tbsp at a time, and beat for 10 minutes on high speed, or until stiff peaks form. It will be smooth and glossy.
- Using a spatula, quickly fold in the lemon juice and vanilla extract, then fold in the cornstarch and gently mix until well blended.
- Pipe meringue into 3 to 3½-inch wide nests onto the parchment paper using a 1M Star tip. Indent the center with a spoon to allow room for toppings.
- Bake for 1 hour and 15 minutes, then turn the oven off and without opening the door, let meringue sit in the oven until completely cooled, about 3-4 hours. The outsides will be dry and crisp to the tap and a very pale cream-colored, and insides will still be marshmallow soft.
- Transfer the pavlova with the parchment paper onto the counter for assembly.
- To make the whipping cream: beat cold whipping cream with 2 tbsp powdered sugar in a cold bowl for 2-2½ minutes or until whipped and spreadable.
- Once pavlova are completely cool, pipe some of the whipped cream in the indentation and top with a little fresh fruit.
- Serve and enjoy within 3 hours.
Notes
- This pavlova is best served fresh and should be eaten within a few hours of assembly.
- For best results, ensure your mixing bowl and beaters are completely clean and dry when whipping the egg whites.
- Prep Time: 30 minutes
- Cook Time: 1 hour 15 minutes
- Category: Dessert
- Method: Baking
- Cuisine: Australian
Nutrition
- Serving Size: 1 pavlova nest with toppings
- Calories: 180
- Sugar: 15g
- Sodium: 5mg
- Fat: 8g
- Saturated Fat: 5g
- Unsaturated Fat: 2g
- Trans Fat: 0g
- Carbohydrates: 23g
- Fiber: 1g
- Protein: 3g
- Cholesterol: 30mg